Saturday, April 30, 2011

Margie and Me: The Glamorous Ladies of Hollywood

I really enjoyed working on this month's palettes.
I made a decision to not skip out on either palette, but to definitely try to tackle both of them.
They really were very different in their color sense, but I am very, very happy with the pieces that I created this month, and I've been wearing them since I finished them earlier this week.


The first up was Ms. Grace.
I took the background color of the light gray that I was seeing in the photo, and made it the main color in this piece. It's a soft pleasing color and by adding the little punches of the yellow and garnet in the embroidery, it kept the piece simple, but pleasing to the eye.


In the close-up, you can see that the ocean jasper bead has these little inclusions in it that give it a druzy-esque finish. 


It's a substantial pendant, measuring just over 2" in length, and I beaded a chain to add a little color up the neck. (It really needed it for balance!)
I've called it Grace's Pendant, and I've put it in the shop here.


The second color palette really had me stumped. I don't think I've ever put together these colors and I really struggled with proportion when I started working.


I tried adding the red, subtracting the red, using black as the focal....
In the end, the red got canned. It just wasn't working.


But, I REALLY like the resulting pendant. It's simple, nothing fancy, but it features this really chunky piece of turquoise surrounded by mustard yellow seed beads with transparent turquoise and matte black.


I worked in the soft pink around the edges by creating a picot that is a smooth transition from pendant to skin. The little drop adds some movement and interest to the piece.
I call it the Warhol Pendant and it's also in the shop here.


The best part about both of these pendants?
I kept records as I worked, noting the exact amount of the supplies and the hours that I spent on each piece and then took into account listing fees, paypal fees, shipping materials and time spent photographing each piece which means that they are priced fair to both myself and my customers.
Which means that I'm proud to put them out there knowing that I've given myself and my work the value that it deserves.
It really feels good to know that it's not arbitrary and that the past three years of learning through trial and error and gaining experience through practice are reflected in my work and in the prices that I charge for it.

I do hope that if you played along this month with Margie and Me that you'll leave a comment with a link to your creation!
I would love to see how everyone was inspired by the color palettes.
Have a great weekend all!

Friday, April 29, 2011

Artisan Clay Design Team Reveal

I'm not gonna lie.
I was stumped when Kristie showed us the pieces that she had created for this month's design team challenge.
I normally work with her cabs (or I turn her beads into cabs), but this time the little connector was really stumping me.
I thought about using lots of chain in mixed metals to create a stunner of a bracelet, but in the end I decided to stick with my little seedies (they've never steered me wrong yet!)


So, I used my current obsession, the Tila beads, to create a bail for the connector and turned it into a pendant.
The seed beads are a silver-lined alabaster and the result is a monochromatic necklace with a really heavy metal feel.


It's a very substantial necklace with a good weight, and great drape from the seed beads.
I was so impressed with the glaze on these connectors, they really feel like metal and nothing like clay.


Bravo Kristie!
You've definitely turned me into a convert with your connectors!
If you'd like to see more pictures of my creation,
I've put Heavy Metal Luster in my shop.
And if you'd like to see more of Kristie's work, and the rest of the Design Team's pieces, you can hop on over to Kristie's blog here.

Oh, and on another note...
Margie and Me is tomorrow!
Here's a sneek peak, and may I just say I am soooo excited about the reveal!
See ya' tomorrow!


Wednesday, April 27, 2011

Tumbling Tiles

I finally finished my latest tutorial project.
It's a beadwoven bangle that I'm calling


It features a sturdy base of Tila beads woven together with seed beads and embellished with more Tila beads and smaller seeds.


The result is a very modern looking cuff with a lot of structure.
(If you'll notice it stands on its own!)

I listed it this morning, and it's available here in my shop.

Short post today because the newsletter goes out this afternoon!
Have a great day all!

Monday, April 25, 2011

On Definition of Self...

ARTIST - a person who produces works in any of the arts that are primarily subject to aesthetic criteria; a person whose work exhibits exceptional skill.

This weekend I had the chance to travel up to Raleigh and visit the Handmade Market. I thoroughly enjoyed every minute of it. It truly was inspiring to see so many artists who had worked so hard to present themselves and their work to the audience. I came home with a few goodies for my mom and my sisters (all jewelry, ironically enough) and visited Ornamentea to stock up on a few things for myself.

While I was at the Market, I had the opportunity to meet an artist whose work I have admired for some time. She was kind enough to pause a little for a chat right in the middle of her show. We talked about beads and giving back and I had one of my pieces on hand that she tried on. Her next question was about price and work time and I knew I'd said something wrong when her brow wrinkled up....
"Marcie, you should be paying yourself more for your time."

(One of my first blog headers from way back)

I've thought a lot about what she said and even about why I find it so difficult to price my work. Every time that I come to that little Etsy bar where it says "price", I panic.
What if it doesn't sell? What if people don't pick me because of the price?
But, that's really not the question I should be asking.
I should ask...Why is it so hard for me to price my work when I'm the only one who knows what goes into it?

Much thanks to Brandi Girl, who hit the nail on the head with her pricing guide, I now know that it's because of how I define myself and what I do. I see myself as a beader or a beadweaver, but I would never call myself an "artist".
Why?
Mostly because I don't "feel" like an artist. But, what is an artist?
If I believe what it says above..."a person whose work exhibits exceptional skill"...then I have to reevaluate my work.

It is true that I'm self-taught, but I've figured out a lot about beads in the past few years and every piece that I create is thought through, designed, planned and executed with that knowledge.
Here are a few of the things that I've learned from a lot of trail and error: 

1. I Don't use cabochons in bead embroidery.
This is truly an anti-embroidery statement that could probably get me thrown in bead embroidery prison.
But, I don't use cabs, ever.
For example, my Desert Safari Pendant. The focal in this pendant is bone. It's a flat piece with three holes running down the center and six smaller holes around the side. It's secured to the backing with a little E600 and the tiny beads that I wove into the small holes along the side. The glue AND the beads hold it in place and by not beading up the side of bead, you can see the whole thing the way it was meant to be enjoyed.
If you visit my shop, all of my embroidered pieces have beads as focal points. I add a dab of glue, and then take my thread up and through the bead to secure it to the backing. The result? None of the stone is hidden under beads and you can truly enjoy the beauty of the stone all the way to the edge.

2. Always create a picot with a large bead, small bead, large bead formula.
I've explained that one here if you want more info. But, basically, it prevents wonky picots that lay on top of each other instead of giving you a nice even raised edge like the one you can see below.


3. You can bead embroider anything.
I had seen pendants and brooches and cuffs when I first started bead embroidering, but before I ever began making the bobby pins I did a little internet search to see if anyone was making anything similar. I didn't find anything, so when I created my first set of bobby pins, I was so excited to see the finished product. 

And it was a logical leap that I jumped from pins to bands...

...and straight on to bangles.

You truly are limited only by your imagination.

4. I am in charge of my medium, it doesn't control me.
I was shocked to read a recent post by one of my team members who lamented that beadwoven jewelry was out and only in style if you were forty-something!
Really!
I definitely did not get the memo and I disagree.
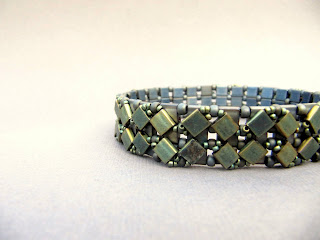
I was surprised to see at the Handmade Market that no one was working with beads. Big beads, yes, but honestly, I didn't see one seed bead in the whole building and yet, I walked around all day wearing this and got a lot of compliments on it. 

It's not the bead that's out of style, if anything, it's the traditional way of weaving them together and as an artist, it's my job to constantly push the boundaries by creating pieces that use traditional methods to make modern statements.

So, what's my point?
ARTIST: a person whose work exhibits exceptional skill.

I'm starting to see my work in a different light and I'm making strides toward keeping better account of the time, materials and energy involved in a piece (not to mention time spent taking photos, packing and shipping pieces).
And if that means that my prices must go up a little, then so be it.
At least I know it will be calculated and not arbitrary and that it will be artist-quality work from someone who values the time and energy that she puts into everything she creates.
I also plan to continue working on tutorials, because knowledge hoarded really doesn't do anyone any good.

I highly recommend that you read Brandi's guide to pricing EVEN if you don't sell your work. I think it's just as important for a buyer of handmade to understand where their money is going and how it will support the artist.

Thanks for your time and for taking a moment to really think about all of the ARTISTS that make up the handmade market.
Oh, and I encourage you, if you have an artist in mind whose work you've admired for some time...I suggest sending them a convo or an e-mail and letting them know, I know that the sentiment will not go unnoticed.
Enjoy your Monday!


Friday, April 22, 2011

Studio Friday: Why not Saturday?

Because tomorrow I am leaving bright and early to go here:

To buy some beadies from this little shop:


And from there, I will be heading over to here:


To see all of these amazing artists.
I'm very excited, and so I'm showing you my new stuff today.

First up, I made a bright little pair of bobby pins. Yes...I said "pair" even though I have no clue where the second little pin went. If you've seen it, tell it to come home so I can take its photo and put them both in the shop.


I also made this tiny little beadwoven charm, which I hung in the center of a bright saffron pendant my MissFickleMedia. This one I did manage to get in the shop. I call it Morrocan Charm.


I also had some really bright lucite stars on hand which I used to create this little brooch that would be perfect for a teacher gift. It also has loops on the back, so you can string it onto a chain or cord to create a pendant. It's here in the shop as well.


I also spent the better part of yesterday diligently working on a tutorial for Tumbling Tiles.
It should be done sometime next week. Monday, maybe?


I've also got a ring in the works, but it'll probably be Monday before that is done as well.
That's it for this week!
I hope you enjoy your weekend!

Wednesday, April 20, 2011

Teach Me Wednesday: Tag, you're it!

Earlier this week, I received an e-mail from the Etsy success team about tagging. For those of you who don't own an Etsy store, this little word has becoming the bane of their existence for some etsy sellers (me included).
Trying to find 12 words that describe your creation and make it 'findable' in the big pile of stuff being sold on Etsy seems like a daunting task and the e-mail that I got from Etsy left me feeling a little well....underwhelmed.
So, I sat down and did a little tagging research and wanted to give both buyers and sellers a few points of advice on tagging. I say sellers and buyers because after making treasuries, you begin to get an idea of exactly how a buyer searches for an item. This will help you when tagging your own.

1. Be super-specific about what it is and how you made it:
Is it a bracelet? Great! Is it also a bangle? Ah-ha! Is it a cuff? Even better.
People who regularly buy from Etsy tend to be specific about what they want and they search with that in mind.
Also, I tend to write "bead embroidered" in my title, but I'll add "bead embroidery" to my tag list in case someone searches the noun rather than the adjective.
I've also added "upcycled" and "recycled" to items when I've re-used materials to create them. Not all of my work re-uses materials, but some of it does.
This cuff for example has "brass" in the tags because it is embroidered around a brass base. (A fact that is explained in the description)


2. Ask who would wear this and where?
I got this idea recently when this bracelet was featured on a blog by an artist who was reviewing a local production of Carmen. This bracelet was part of a feature with other artists who were doing flamenco/Spanish-inspired work.
I can only imagine she found it because I had "spanish" in the tag.
So, is your item for a steampunk fan or a gothic girl or a modern trendsetter? Would they wear it to the prom or on a cruise or for a date night or to work?
Try to think outside of the box with this one as well.


3. Be "aqua marine ocean blue" color specific. This really works if your piece is monochromatic and it's very helpful if you want to get into Treasuryland or if you're making a treasury!
On Monday, I was searching "mustard", "garnet", "buttercream", "gray", all in an attempt to make my Grace Kelly treasury.
It's not just blue, it's denim blue with ivory rounds and hints of mustard yellow seeds with layers of chocolate brown.
This article by the Etsy Treasury Team gives great alternatives to commonly used nouns.


4. Use your internet resources to see what people are looking for.
I check Craftopolis and the tag report to see what terms people are using to find my work, and then I'll include that term in almost all of my items. (After all, everything I make is "beaded", no?)
I've used Tagwars in the past to see what the post popular keywords are for the tiype of jewelry that I'm creating.
Google Insights can also help you to identify what kind of keywords people are using to find products similar to yours and to help you narrow your market a little as to where they are finding those products.
Oh, and on the note of internet searches...be sure and add your name and/or shop name in at least a few of your items. I've checked Craftopolis to find that people are searching "la bella joya" in Handmade, and they're not going to find my shop that way, so I've added my name to a few of my tags just to be sure.


5. Last but not least, and I think that this one is really important:
Ask someone else! Really.
Sometimes you're so close to a piece that you can't see what you've actually created. Maybe you wanted it to be Grace Kelly and it ended up being Katherine Hepburn, or perhaps you were thinking art deco, but may have crossed a little over into arte nouveau.
(My mother is an artist and old movie buff, so she's full of much better ideas than I am on this one.)

Okay, for a little practice. I created this bangle yesterday and I'm really struggling trying to find a name for it (and consequently some tags).
Here's what I've got so far:
geometry squared
tic-tac-toe
checkerboard
sideways squares
tumbling tiles
three-lane highway


What do you think? What words would you use to describe it?

I hope some of this info is useful to you. If you'd like to do some more research, follow some of the websites above for more info, or just search "Etsy tagging tips".
Have a great Wednesday!

Monday, April 18, 2011

Margie and Me: Inspiration Monday

I was able to create a treasury yesterday with the color choices from the first Margie and Me palette.
I really like the mix of the deep garnet color with the mustard and the punches of gray.


There are a lot of options with this color palette.

I will admit, the second color palette really has me stumped.
The green isn't really a "green" and it's not quite a blue, I couldn't think of what to call it!
Teal just didn't seem like it was the right color either.
Any ideas?
I did think of Tourmaline as a good stone choice for this palette, but that's about as far as I got.


Finally, I wanted to show you what my bead buddy Lois created over the weekend. She used the pattern that I sent out in my newsletter to make a pendant in a Strawberries and Cream colorway.
I think it looks great and if anybody has got the hankerin' to keep weaving, you could probably get a whole bracelet out of these little stars.


Enjoy your Monday and if you've got any inspiration for Margie and Me (especially the Andy Warhol palette), I'd love to see it!


Saturday, April 16, 2011

Sutdio Saturday: Newness in the Shop!

I'm really excited about today, because I finally have some brand new things to add to the shop!
I worked really hard this week to make some brand new creations.
The shop has really been missing some new beauties so an infusion of beautimousness is what it needed. :)

First up is a sweet litle bead embroidered pendant featuring a couple vintage lucite beads.
I call it Old, New, Borrowed, Blue and it's a little more "traditional" maybe than what I normally create, but I love the soft colors and I think that this shade of denim blue looks great with the long copper chain. It's in the shop here if you'd like to see more pictures.


I also got hit by the stringing bug this week.
But...you guys know that I can't do anything without adding a little beadweaving into the mix, plus, there are so many wonderful artists out there doing stringing work that I want to set my pieces apart just a little. I think adding the little beaded beads does just that.
This bracelet also features a little vintage lucite and it's here in my shop as well.


This piece was inspired by a pendant that I created some time ago.
I've had a couple of these cinnabar beads hanging around for a while and I really like this mix of the bright red with the turquoise.


This pendant is a little smaller than some of my others, but I think that the colors make such an impact and I strung it on a short leather cord so that it hangs just below the collar bone.
I call it Short Trip to China and it's also in the shop.


Last but not least, I listed the little bangle that I created on Wednesday.
I call it the Yellow Bird Bangle.
I really like finding new ways to use bead embroidery and this turned out exactly as I had pictured it.


It's a great mix of the hard copper wire with the soft embroidery and silk ribbon running along the edges. I also like the sweet little hidden birdie on the back of the medallion. My plan is to order a few more of these little connecting charms that I can use to add a little surprise to each of my pieces. 


Enjoy the rest of your weekend, I hope it's a creative one and thanks for stopping by!

Thursday, April 14, 2011

Not quite airmail...

I smiled yesterday when I opened my newsletter account to find that about 20 more people had signed up for the newsletter!
I'm pretty sure everyone wanted the free pattern to the stars, though maybe it was just the opportunity to get mail from me! ;)
Either way, I'll be re-sending the newsletter this afternoon, so if you'd like to get the free pattern from the little stars seen in the post below, please go ahead and sign up to the right, and it will be in your inbox this afternoon (along with your Mother's Day coupon!).

Oh, and if you've ever wondered about my tutorials, I use the same illustration process for all my tutorials, obviously the actual PDF files are definitely more detailed and I include photo images, but the illustrations are the same.
Also, thanks for all your sweet comments on the bangle.
I'm working diligently to get a few new things in the shop with Mother's Day in mind.
I also have definitely not put the tutorial making on the back burner and next week I intend to work a little on some new designs.
Thanks for your support in all its many forms!
Have a great day!

Oh, by the way, any requests in terms of new designs/tutorials? I'm thinking a pendant design. What do you think?

O, tambien, les queria decir a mis amigos que reciben mi e-mail, pero que hablan espanol....las instrucciones estan en ingles...pero si tienen duda, me pueden enviar su pregunta a esta direccion: abney_m(at)yahoo.com.

Wednesday, April 13, 2011

It's what's inside that counts...

I like to use unconvential materials when I embroider.
That's how I started making the bobby pins, and then moved on to headbands.
This time around, I created a bangle using some wire bangles from MissFickleMedia.


I embroidered a little medallion, secured it to the wire, and then wrapped it with some ribbon and more wire.


I also hid a little bird behind the medallion, just so it's pretty from every angle.


Oh, also, today, if you're signed up for my newsletter, you'll be getting the instructions to make these:


You can still sign up in the right-hand column if you haven't yet.

Enjoy your day!