
I've gotten such great feedback from my Looking Glass Pendant Tutorial and I've really enjoyed looking at all the great versions of that design that you all have created. It's nice to see you really running with it and making it your own.
So, to keep with the inspiration, I wanted to give you another free tutorial. This time a bracelet!
The one is easy peasy and recycled!


I created the Indigo version you see in this photo as a gift for my sister for Christmas.
It worked up so quick and looked so good that I knew I wanted to make one for myself, so this time around, I photographed the steps to share with you!
I hope you enjoy!
Skills:
To create this bangle, you will need to know how to do Peyote Stitch and you'll need to know how to zip up a Peyote tube.
Materials:
- A hank of Color Infusions Memory Thread in color of your choice (I bought mine back when everyone was buying this stuff, I'm so glad to finally get to use it!)
- A metal bangle (This one is one of those cheapos that I've had forever so don't feel like you have to go out and buy one, hence the upcycling! Make sure the width is around 5mm so that you can cover it completely with one hank of the thread)
- 3 different colors of size 11 Japanese seed beads.
- Nymo Thread (or Fireline)
- E6000 craft glue (or similar strong craft glue).
- Size 12 beading needle
- Scissors

Instructions:
1. Put a pea size amount of glue on the inside of the bangle. Wrap the thread around the dab of glue a couple of times. (Tip: keep the thread on the shuttle and pass the entire shuttle through the bangle as you work to avoid knots.)

2. Make sure your wraps are tight and close together. You will have glue seeping out between the cracks, don't worry about it, just wipe away the excess with your fingers (yes, this is a messy job).

3. Keep on wrappin!

4. Yep....still wrapping...

5. Whew...getting closer....

6. Light at the end of the tunnel!

7. When you have about 1/4" remaining, add another drop of glue. (Again, messy but don't worry, we will hide this later!)

8. When you come to where your thread meets the thread where you started, snip the thread leaving 3 or 4mm.


9. You may need to snip a little more, but use your fingers to press the remaining thread down against the bangle until it is as flush as you can get it and then wipe away the remaining glue.

10. Set the bangle aside, the glue will dry while you work on your peyote tube. Get out your beading needle, thread and beads. I've chosen a yellow mustard color, a lime green and a matte frosted sienna.

11. String on an EVEN number of beads in a random color pattern. I did 30 beads for the Maize bracelet and 20 for the Indigo. It really depends if you want a small strip of color, or a large, but just remember that you will use this to cover your gluey thread connection, so make it large enough to hide that.


12. Work in Peyote stitch, after you've threaded your beads, thread one more and pass through the second to the last bead that you just added. String another bead, skip one and pass through the next. Continue working peyote in this manner.
If you've never done peyote, fear not....found you a great video here.

13. Keep working in peyote. If it starts to curve, don't fret, just keep working, trying to choose beads that are the same size as you work.

14. The strip will eventually pull itself straight as you work.

15. Check your piece as you work to see that it will wrap around your bangle and also that it will zip up. To determine this, count the beads along the width of your strip, they should be an even number in order for the strip to zip up.

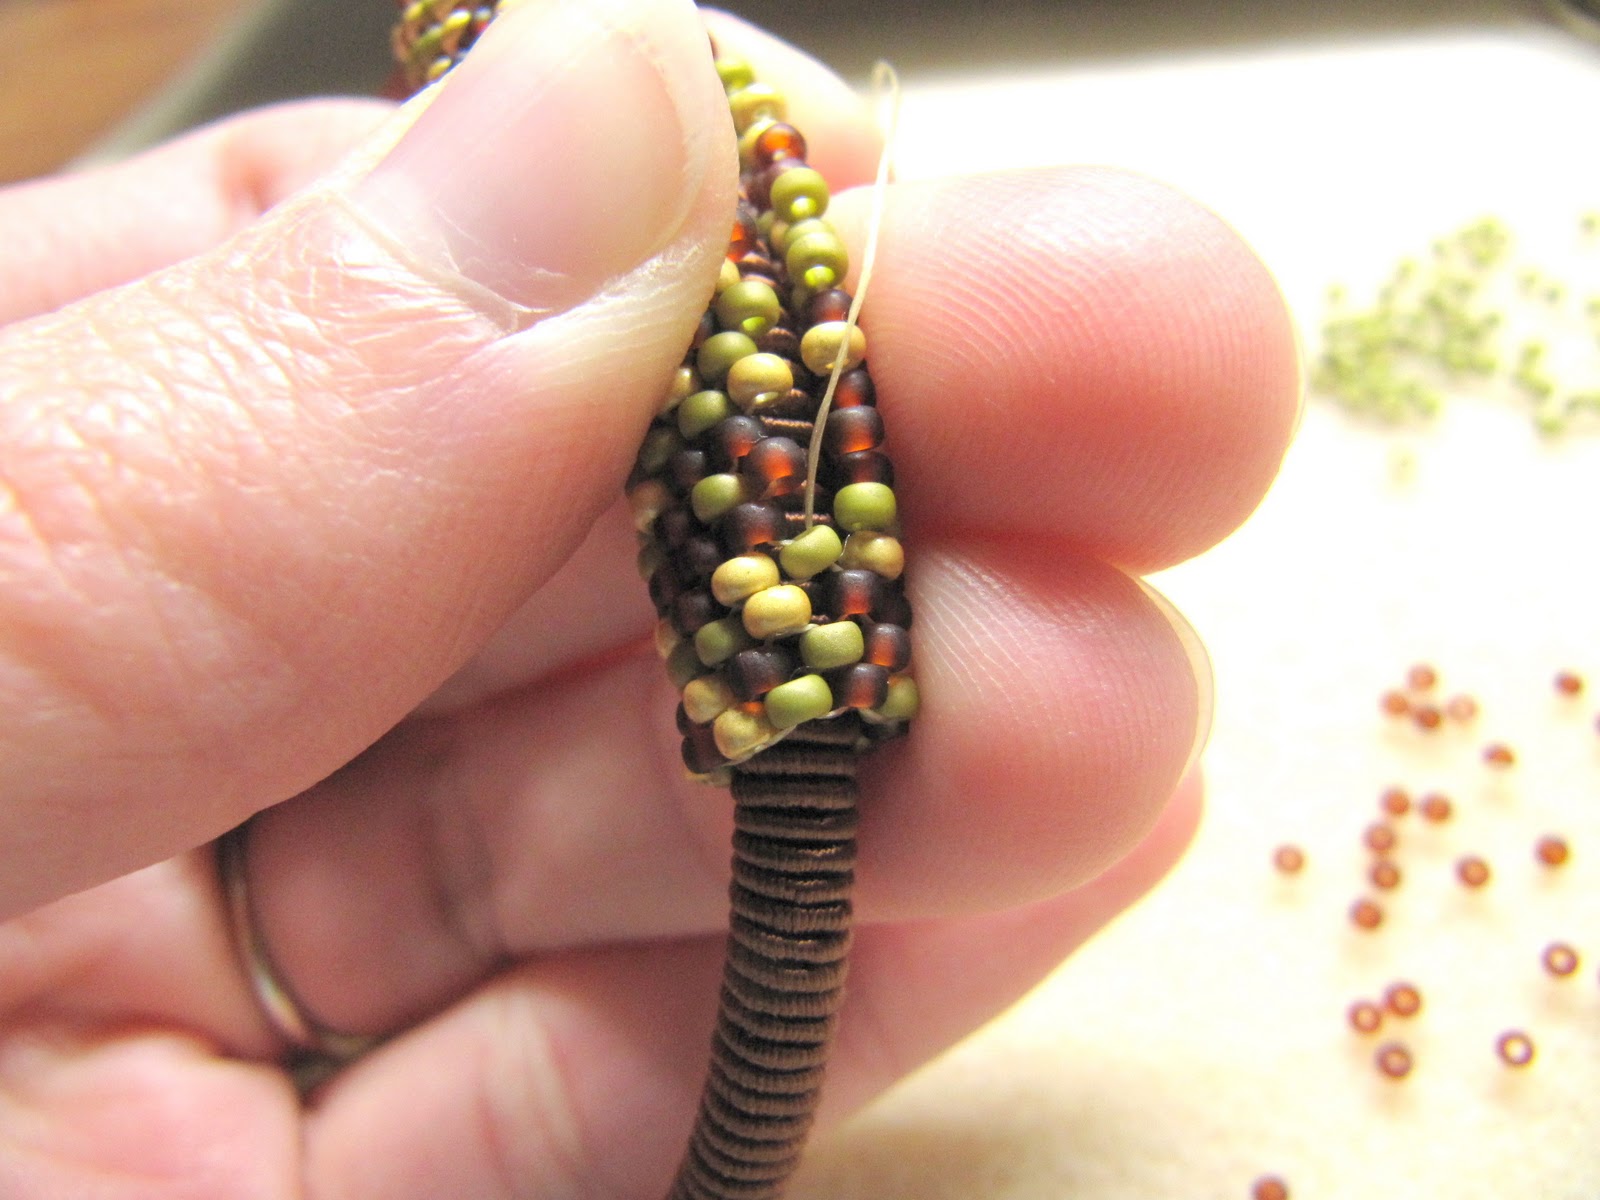
16. Wrap the piece around the inside of the bangle and over the glue connection that you made.

17. Here's a better photo:

18. Begin zipping up your peyote tube. This means that you will not add any beads, but use those from both rows to lock them together.
Check out this really clear tutorial here for further instructions.
19. When you have finished, knot the threads together. I always go back down through the thread path that I just went through again to reinforce the join. Weave the tail thread and the working thread into the beadwork, knot two or three times and trim the threads.

Voila!
You're done!


This project is only limited by your imagination.
Try a few variations:
- Mix up the color scheme. Use a contrasting thread with contrasting beads.
- Create two or three peyote tubes and wrap them around different sides of the bangle.
- Try a bigger bangle and use more thread. You'll probably have two gluey connections, but make two peyote strips to hide them.
- Make a few bangles in coordinating color schemes and wear them all or one at a time.
-Create a peyote tube with a chevron pattern for a funky tribal flavor.
These make great gifts. They're easy to wear and easy to make and the best part is the price.
I'm sure I didn't pay more than about $5 for the materials, and the results are well worth the time and effort.
I hope you enjoy creating these bangles and if you finish one, I'd love to see your version, so send a photo my way!
Enjoy the rest of your weekend!
Great tutorial. I keep looking at that memory thread, but haven't bought any. Can't wait to pick up a few colors and whip up some bangles. Thanks!
ReplyDeleteEasy, Yes. Unlimited, Yes. What a winner!! Thanks for the diy!!
ReplyDeleteWhat a great idea! I will definitely be giving this one a try. Thanks so much for sharing.
ReplyDeleteI hope you are feeling a lot better now too!
Karyn
How much of the thread would you use in this bracelet? I am looking at other materials but just not sure how much I'd need for one bracelet.
ReplyDeleteThanks,
Karyn
Marcie,
ReplyDeleteThank you for sharing this tutorial. The ideas for this bangle are many.
Therese
Thanks for another tutorial! I have the window pendant and this one now in my 'To Do' list of projects.. now to finish up the 'Must Do' list!
ReplyDeleteThis is a lovely bangle. Thank you so much for the tutorial!!
ReplyDeleteMuchas gracias por el tutorial tan claro explicado.
ReplyDeleteAwesome tut, Marcie! Thanks for sharing!
ReplyDeleteA very beautiful design... this is adorable and easy to make it!!!! thanks a lot for the pattern....
ReplyDeleteMarcie, So cute! Love the combination of colors, materials and textures. I would totally wear these. I really, really love them. So much so, I'm almost tempted to pick up a needle and thread. I like the name Maize. I made a simple leather bracelet recently that had multicolored seed beads wire-wrapped around the center, I almost named the bracelet maize because the pattern reminded me of the corn...great minds think alike!
ReplyDeleteBeautiful idea!
ReplyDeleteThank you for sharing!
You are the bestest thank you!
ReplyDeleteGreat tutorial! Thank you for sharing!
ReplyDeleteLovely idea and fine tutorial, thank you!
ReplyDeleteThat is so gorgeous it makes me want to take up seed beading. But then I remember my one and only try at it, and the window it flew out of when I got exasperated, and think... no, buy it from her.
ReplyDeleteLove the colors on the yellow and green bracelet. Would like to link to your blog from mine and share a picture? Would that be okay?
ReplyDeleteThanks for your generosity.
Carolyn
carolynscreationswa.blogspot.com
Excelente, muchas gracias por compartir............
ReplyDeleteWhat a beautiful blog full of great work! And thank for your tutorial, its
ReplyDeletevery inspiring.
Greetings
Aunty Akoya
A great tutorial! Thank you for sharing!
ReplyDeletemuchas gracias por el tuto, tan bien explicado y lo bonito que queda
ReplyDeleteThank you so much for sharing. I always look for new ways to make jewelry. Linda Reilly
ReplyDeleteIt is great! Thank you!
ReplyDelete