
First off, sorry about Monday.
I know I promised y'all inspiration Monday for Margie and a coherent entry about kits and "of the month" clubs, but Monday turned out to be a little hectic and Tuesday didn't dissapoint either, so I just decided to keep moving and I'm back with this week's tutorial:
Making Wrapped Loops.
Specifically making wrapped loops in tight spaces.
Now, I know what you're thinking....
all you have to do is make a bunch of wrapped loops and then slide a jump ring through them, close the jump ring, and your done!
But, what if you want some dimensionality? What if you want wrapped loops hanging at different levels, or you want to attach them to a connector or piece of beadwork that you can't open and close?

I ran into the same problem, and came up with (what I think) is a clever solution.
Now, it may be that everyone else in the world does this, and I'm just the last one to catch on, if that's true...oops!
But, no one told me, so I figured I'd spare you the re-invention of the wheel.
First up, the basics of making a wrapped loop:
(if you already know how to do this, scroll down to the step labeled "The Good Stuff")
1. You'll need:
a headpin
a bead
a seed bead (if the above bead has a hole that's larger than the headpin)
a headpin
a bead
a seed bead (if the above bead has a hole that's larger than the headpin)
chain nose pliers (2 pairs)
round nose pliers
wire cutters
(ignore the watch face for now, we'll use him later)

2. String your seed bead and your big bead onto your headpin.

3. Use the chain nose pliers to make a bend in your wire about a 1/4" from the top of your bead.

4. Use the round nose pliers to make a loop in the pin just above where you've created the bend.
(Do this by rotating the wire around the pliers, not the other way around.)
(Do this by rotating the wire around the pliers, not the other way around.)
5. Use one pair of pliers to grip the loop you just created and use the other pair to grip the tail wire sticking out from the side.

6. Wrap the wire around the 1/4" piece just above the bead. Try to make your loop as tight and as close as possible.

7. Use the wire cutters to snip the end as close as you can and then squeeze the end to the base wire to make a clean wrap.

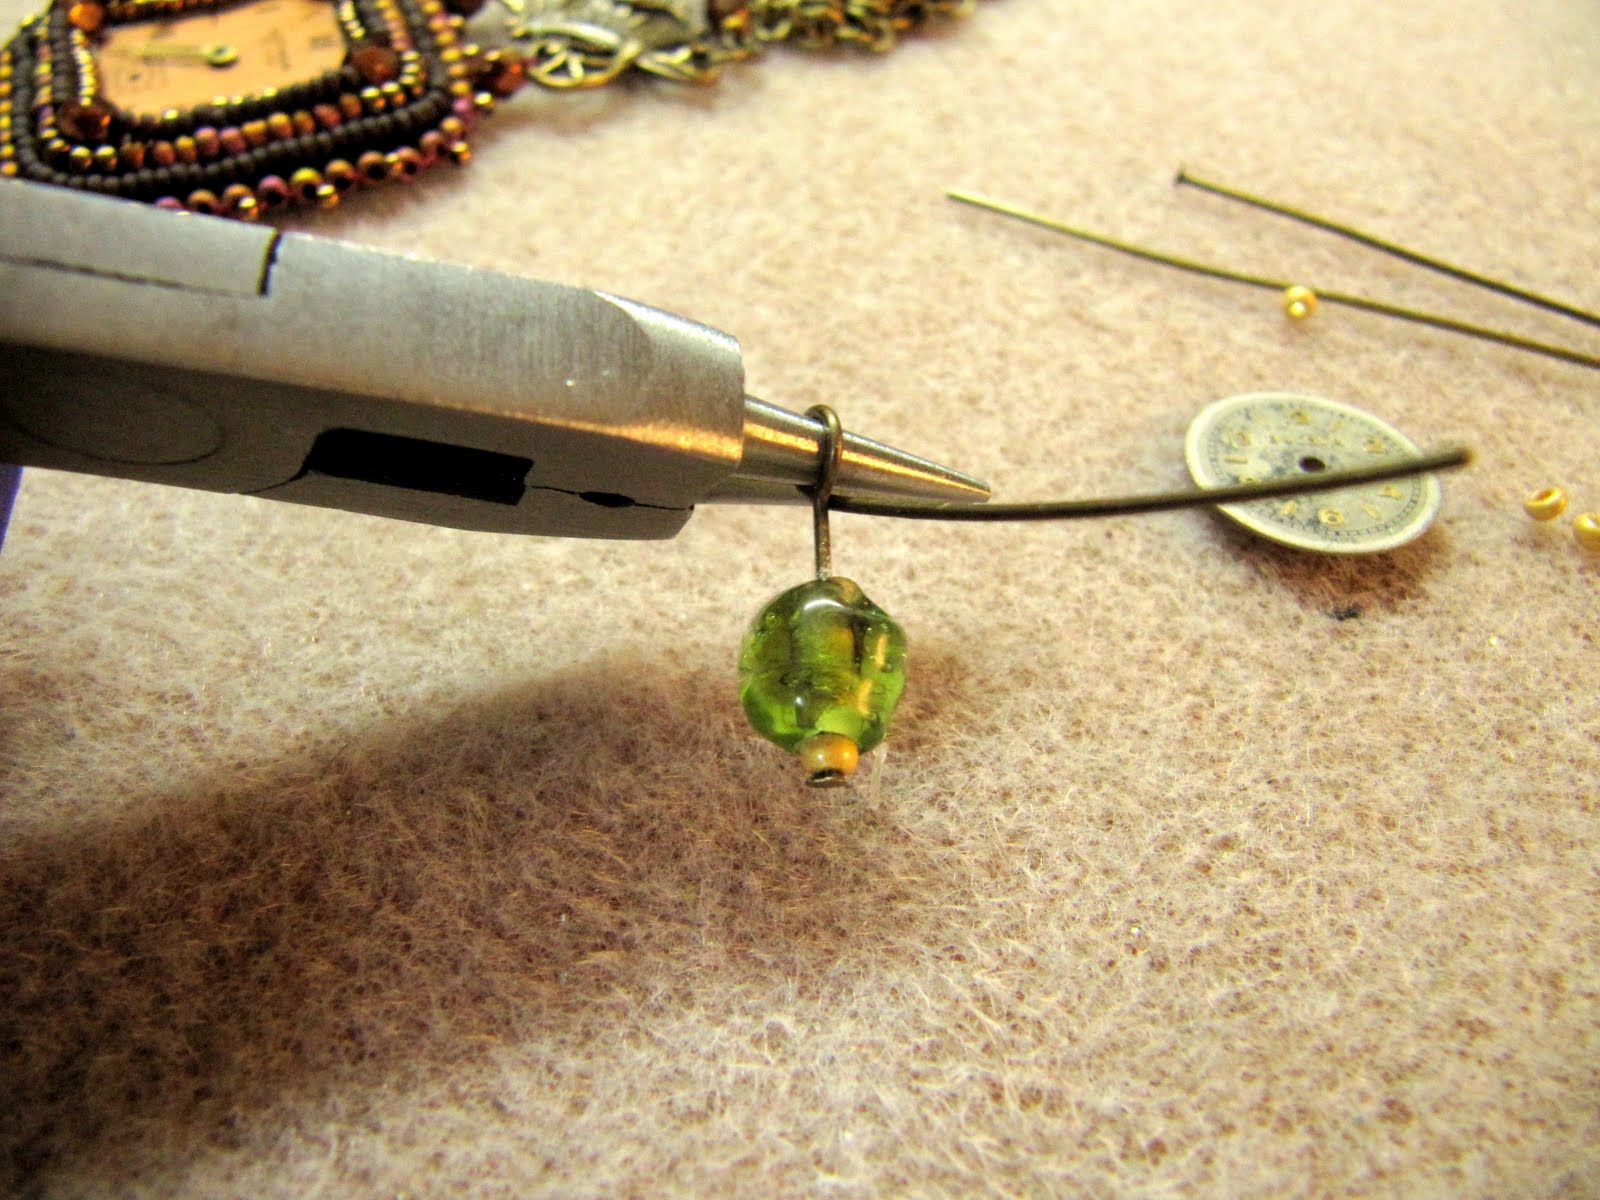
8. The Good Stuff:
Take your wire cutters and snip your loop as close as you possibly can to the wrapped portion of your loop.

9. Voila! You now have a perfectly wrapped loop that opens and closes like a jump ring!
This means that you can attach dangles to anything...closed connectors, beadwork, soldered chain...you name it.
The great thing is that because you're not dealing with working against another component, you can make a gorgeous wrapped loop and then add it to your work!

Now, I will say this: The whole upside to using a wrapped loop is that it creates a closed loop that can support a little more weight, and won't allow anything to slip out of it, so don't use this technique if you're going to put a lot of weight on the loop, but it works great for fringey dangles.
Okay, remember the watch face?
We're going to use him to make what I call Pinwheel Dangles.
Remember the little pinwheels from elementary school, where you had the pinwheel on a straight stick and it faced you, not the sky like a flower?
This is the same concept.
I used it in my Meet me at 7pm necklace to make dangles out of the little clock faces. I wanted them to face out, not down.
Here's what I did:

1. Make your wrapped loop like we did above in steps 1-7, but leave a tiny smidge of room between the wraps and the focal bead, maybe 2mm.

2. Grasp the bead or finding in one hand and the wrapped loop with your pliers and bend up! Easy as pie. Now you have a dangle that faces out and you can show off your watch faces, or flat spacers or those lovely lampworked discs that the glass artists work so hard on.

I hope these help and I should warn you that making dangles is addictive.
You're going to find yourself fighting the urge to put dangley fringes on everything.
Have a great Wednesday!
Thanks for the great tip!
ReplyDeleteThat's a great idea! I don't make jewelry anymore, but I remember the frustration. I called myself "man-hand Lori". :)
ReplyDeleteYou're a genius! I'm off to try it.
ReplyDeletePerfect solution... :0)
ReplyDeleteGenius! Now all I need to do is perfect my wrapped loops...
ReplyDeleteLaura
x
LOL .. I just had a 'duh' moment when I read your tip on the flat watch face dangle!! that is such a simple solution.. that never occured to me! so.. thank you :)
ReplyDeleteI know what you mean about dangles becoming addictive. I am currently infatuated with dangle/charm style bracelets.
Clever solution to your wrapped loops and should be just about perfect for the weight of bead you are using.
ReplyDeleteHi there! I would love to learn how you do your beading around your cabochons. You do not hide the stone like most people do. Please please share! Thanks!
ReplyDeleteSo sweet of you to share your great tips! Thanks very much, and I will definitely be trying those out soon!
ReplyDeleteJust goes to show no matter how long you've been working with wire, there is always something new to learn! I love your tip for making a wrapped/open loop! I've only done that by accident, snipping the wire at the loop somehow. I love the idea of doing this intentionally! It really makes sense if you're not worried about any pulling on the bead. And the tip for turning up the watch face is so clever! The "Meet me at 7" piece is incredibly gorgeous!! I love what you did with that watch.
ReplyDeleteWhat a great tip! Thank you! :)
ReplyDeleteWhat a great idea! I love wrapped loops and this makes it easy, especially when you forget and finish your wraps before you attach your dangle. No more wasted wire and time re-doing the dangle!
ReplyDeleteThat is the best little tutorial I have seen and I think I could actually make it. Wire and I have not been friends so we will have to see. LOL
ReplyDelete