Saturday, October 30, 2010

Margie and Me - Rococo Christmas

This Margie and Me challenge was particulary challenging for me. These are some colors that I don't normally wear, so...when I started to think about what to create, I settled on making a little ornament for my sister's Christmas tree. She usually does the blue/gold thing, so these colors looked perfect!


The ornament was created by making a beaded bead and then using netting to create these little star bezels coming off of the corners where the beads meet. I also added a little fringe, because it's Christmas!
Here's the rest of my week and if it's got a link, it's in my shop and you can see some more pics:


A gray pendant, that I'm loving calling My Gray Sweater, because well....guess what it matches?


Some Fiery Red Bobby Pins in the teardrop shape. I think I like the teardrop shape the most.


I also put my Autumn Colors Medallion in the shop. I wish I could explain to you how great these feel when you wear them, the weight is just perfect!
I also went a little ring crazy!
The first I call Gray and Orange in Concentric Circles... (yes, orange!)

The second is Sophia's Ring...(she's a Spanish Flamenco Dancer)

The third is Picasso's Ring...(I mean, come on...do I have to explain it?)

These last two? Well, these last two are for you. Yes, here's the deal, I wanna trade, some beads for some rings. So...if you're willing to send me a bundle of beads for one of these rings, it's yours! Just leave me a note in the comments with the ring that you want and your e-mail so I can get back to you.
The first one up for grabs is the Ocean Well Ring...it's blue and creamy and reminds me of the ocean.

The second one is a Green Ring...Rhyolite surrounded by tiny seed beads.
These rings are first come first serve, so get 'em while they're hot!
The only stipulation to my trade is that I don't want seed beads!

Update!
I was in such a hurry this morning that I forgot to post Judy's Margie and Me! She sent me the photo of this  gorgeous necklace last week and the colors were just perfect for the Rococo challenge. Thanks Judy!


Thanks for stopping by! Don't forget to leave your link if you made a Margie and Me this time! Enjoy your weekend! 

Thursday, October 28, 2010

Where We Create and somebody is gettin' some beads!

Alright, here's the disaster....stuff for makin' rings. Lots of stuff for making rings. And seed beads, of course. I've been embroidering my brains out lately.


In other news! Guess who made it to the front page of Etsy?!! Too bad it was at the butt-crack of dawn, but I was actually awake to catch it! Here's the treasury, if you want to check it out, click on the picture. My little Arrowhead Pendant is holding the third spot on the last row. Cool, huh?


Okay, here's the bead winner! And by my calculations, number 7 of my comments was Ms. Lori Plyler! Bag of zipper pulls coming your way!  :)

Thanks for stopping by!!! Don't forget about Margie and Me! Big reveal on Saturday! Hope to see you and your rococoness there!

Wednesday, October 27, 2010

Artists Answer: Denise Yezbak Moore

Denise Yezbak Moore is a freelance jewelry designer who is frequently published in a variety of beading magazines.  Her fascination with antique jewelry led her to create jewelry.  She Lives in Orange County, CA with her husband Rusty and their two children Garrett and Britton.
 I first started noticing Denise's creations when I picked up my Bead Star 2009. I was so impressed with her creativity and sense of style. Her name immediately came to mind when I started looking for artists to feature for my series. I am continually inspired by her work and was so excited when she agreed to tell us a little about how she organizes her stash.


 How do you organize?

That is a funny question. I am forever in search of the perfect organizational system for the beader/jewelry designer. I do not think one has been discovered yet. For my personal bead stash I use black stacking trays that fit perfectly into an antique armoire. My findings and beading wire are kept in plastic containers that are also located in the armoire. I display my art beads and pendants in artisan ceramic bowls that I keep in my office. Some of my newly published designs or items for sale on Esty hang on a rustic wire tree.


My Art Clay Silver supplies are located on a workbench in my garage. I use a “Lazy Susan” stationary holder to display my tools and clay. I also have a nuts and bolts plastic rack that I purchased from Home Depot to hold smaller tools and molds.


What are your tips for organization?   
I design for Halcraft USA, the supplier of “Bead Gallery” beads sold at Michael’s.  Since I work with such a large volume of beads, I needed to come up with a convenient inventory system that would visually inspire me.  I decided to make a purchase of small round metal displays that spin.  I found rounders on eBay.  I group the beads into colors or materials.  It is a perfect system for me.  It’s like having a bead store in your studio (or my case “beading office”).  My hope is to one day transfer all my personal beads into this beading system.  It would require a considerable amount of time to restring my tremendous amount of beads. I think it would be worth it, I just need to find the time.

(I am loving this idea, it would make me feel like I was "shopping" for beads everyday!)

How do you stay organized as you work? 

Before I start designing, I select all the materials I will need and put them on a tray.  I then gather my beading tray, tools and Ott Lite.  I like to design at night on the couch.  I know it sounds strange, but this allows me the freedom to design and spend time with my husband and children.  My husband calls my workspace on the couch “the nest” because I am surrounded by everything I need.


How do you organize your ideas? 

Most of my designs are one-of-a-kind; inspired by the materials I am working with at the time.  Often, when an idea pops into my head I will sketch in a journal (I use the word sketch loosely).  I also have a binder were I file photos and magazine pages that inspire me.


Thanks so much Denise for your insight! I hope you've enjoyed sneaking around her creative space as much as I have. If you'd like to see more of Denise's designs, here's some places you can find her:

Thanks for stopping by Artists Answer! Don't forget to enter my bead giveaway from Monday's post! Enjoy your Wednesday!

Monday, October 25, 2010

I'm giving away beads!

There. I said it. I know it was supposed to be a surprise, but those are things that I cannot keep, so go here and sign up to win!

Also, do you remember the cuff bracelet that I told you I was working on creating a tutorial for? The one that made me ill because I messed up one of the illustrations and had to go back and do it again? Well, I finally finished it!
Here it is:
Spanish Lace Cuff Tutorial is in the shop.


Along with the actual cuff itself, which can be found here. It's in this lovely gothic green color. I'm lovin' those metallic green beads. I do hope you'll check it out.

Okay, and I promised you some Margie and Me inspiration, so here goes....
First up is an amazing dress. You have to go see Pink and Champagne Fantasy Marie Antoinette Sparkle Gown Custom by RomanticThreads, it really is gorgeous.


Also, I'm in love with Athalie Wedding Bracelet by EderaJewelry, it's so feminine.


Last but not least, these little pointed Marie Antoinette Kitten Heels by ZebraCakes are fantastic.

I hope these got you a little inspired to get on the ball and finish your Rococo piece! I know it did for me! Have a great Monday!

Saturday, October 23, 2010

Saturday Wrap-up

First thing that I worked on this week was this embroidered cuff. The plaid pattern was inspired by a fuschia/green plaid shirt that I saw at the Belk last weekend. The colors really hit me and I just had to recreate it.


Also, remember the sewing machine from Thursday? Well, it all started when I was trying to think of a way to take my construction to the next level and I remembered what my mom always told me, "It's what's inside that counts." So, to that end, I added my little stamp and a little pizazz to the inside of the cuff.  I can see this becoming very addicting. I already have plans for some longer messages embroidered on the inside of larger cuffs.
If you'd like to see more pictures, this cuff is in my shop.
(By the way, I was gonna put LBJ on the back, but I really don't want my work to appear as a homage to any former presidents.)

I also added this bracelet, Busy as a Bee to my shop. I think it'd be perfect as a Christmas gift for a teacher, mostly because I know from experience that this time of year they are definitely busy as a well...you know.


Okay, this next cuff was totally me trying to get rid of my fear of orange. The pattern was inspired by this repeating pattern that I saw in a book about Islamic architecture. The cuff itself has a very luxurious feel. The colors fade from a deep, almost persimmon to a soft creamy yellow with the little repeating pattern in the center. My plan (if I can get around to it) is to create the pattern and offer it free to you guys as a download.
In the meantime, I need a name, any suggestions?


As I created this cuff, I remembered why I don't do much peyote anymore... I do not have the patience!


I also finished my first headband for the shop! I call this one Autumn Turquoise.

I think this would look so cute on a little girl. Unfortunately, I do not have one of those, so in the meantime it's gonna be adorning my big cabeza. :)


This second one is for my sister, so it won't be in the shop, but I did get it done last week.


Okay, these last two rings won't be going in the shop because I have plans for them (stay tuned). But this first is a skinnier version of Heather's Ring in some fall-appropriate colors.


and a Bollywood Bling Ring in holiday tones.


Whew! If you hung in for all of that and made it through, you deserve something special, which is why I'm doing a surprise giveaway!
Last week I cleaned out my bead hoard stash and found a ton of beaded beads that I'm probably not gonna use anytime soon, so I've decided to give them away to someone who will use them, and as I know that a lot of the peeps that read my blog are stringers, (Oddly enough, my grandmother's maiden name is Stringer...go figure) I figured you could use some beads.

These are all individually handmade. Go ahead and click on the pic to see them bigger. Some already have the wires in them, but you can definitely snip those out. My only requirement for the giveaway is that you leave me a comment with a suggestion for the cuff that I created above that I don't know how to name. Also, you can share if you want, or you can keep the news to yourself in the hopes that no one else will comment and you take home the loot. It doesn't matter to me, but I'm just gonna do one entry per person and I'll draw on Wednesday!
ENJOY YOUR WEEKEND!
(On Monday, I'm gonna send you some inspiration for Margie and Me. How's your Margie and Me project going by the way??)

Thursday, October 21, 2010

Where We Create

Lori (the one who makes the awesome bags) is doing a series called "Where We Create" and I thought I'd jump in on the fun. Here's what's in my space right now, and yes, trying some new things with a bobbin and some thread, and a sewing machine. ;)

Wednesday, October 20, 2010

Creative Musings: HierARTchy - Letter to a Beginner

Dear Beginner,
First of all, I'd like to start by saying that you're not alone. There's a reason for the extra space at the foundation of the pyramid. It's the place where we all begin, where we all start to find what we like to create and how we like to create it. But the point of the pyramid is to keep going up, getting better and better. I've learned some lessons as I've climbed that I hope will help you, and I wish someone had told me when I first started climbing.

First lesson, everyone was once a beginner, and may even still be at something.
I know you like to visit blogs and read books, and pore over articles of how-to's and how-not-to's. I know you see things that some of the professionals are doing and you think to yourself....there's no way I'll ever be there. But, remember, they were once in your shoes. I'm pretty sure not one of them walked out of their mother's womb making perfect wrapped loops or weaving smooth, flat peyote cuffs. Everyone begins somewhere and the first thing that you'll need to keep on going up is a little confidence to say, "Hey, if they can, I can...".


 The first strung piece of jewelry that I ever created. NO wrapped loops and the little filigree part at the bottom just literally fell off one day!

The next thing you're gonna need is a little patience with yourself. I know that you've done that tutorial from that magazine six times and it still doesn't look like the picture in the magazine. Well, maybe you'll have to do it six more. I filled up a garbage bowl with wonky herringbone samples until it just hit me one day and I could herringbone with my eyes shut! I know it's frustrating when what you're trying to do doesn't come out the way you want it, but take a step back and ask yourself, is there something else I can do that will teach me this technique in a simpler, more straightforward fashion? (Here's where a good tutorial, magazine, or book comes in handy) There's a reason that most magazines rank their projects based on difficulty, use that ranking, you'll end up a lot less frustrated and a little more patient through the learning process.


 My attempt a a "bling ring". Kinda looks like my bead box exploded on top of an adjustable brass base.

Also, you're gonna need some inspiration. I've said this before, but it's worth repeating. Find what inspires YOU! Me and nature? Not so much. Other than the colors, I'm really not a huge fan. Now, that said, give me a book on ancient roman architecture and I guarantee you I can find something worth turning into a necklace or bracelet. So, when you hear a designer say, "I'm really inspired by roses, who doesn't love roses?!" Just remember, you're not that designer, and you've got to find out what inspires you.

I made a billion brickstitched pendants during the summer of 2007. No, really....

Okay, last but not least (well, this isn't an exhaustive list, I'm sure there's more), you're going to need to practice. You know that one recipe that you know by heart? Well, you're jewelry process needs to be the same way. You need to do something again and again until you can do it without even bothering with instructions. They should be written on your heart and in your fingers. Honestly, after my brickstitch summer bonanza, I could probably do brickstitch wearing a blindfold while riding a roller coaster in the dark. This is where the focus comes in. 

My first bead-embroidered anything. It's a brooch, and I honestly have no clue where I put it!

You  have to find what techniques and materials really speak to you in order to master them. I like to do stringing about once a month, but I'm in love with bead embroidery and beadweaving, so it's those that I practice at least once a day. Trust me, you'll know what it is you like to do. It'll just come, you won't have to search too hard, but keep trying different things until you find the one that really speaks to you.

 The first thing that I ever sold on Etsy. A bead embroidered cuff bracelet of my own original design.

Don't give up, one day it'll happen, you'll create something original and unique and you'll love it, and it'll be you and you'll wear it around the house in your lounge pants because you're too lazy to get dressed, but you still want to wear whatever it is that you just created. It's a great feeling and one definitely worth working toward.
Oh, and it'll put you one step closer to the next level of the pyramid...

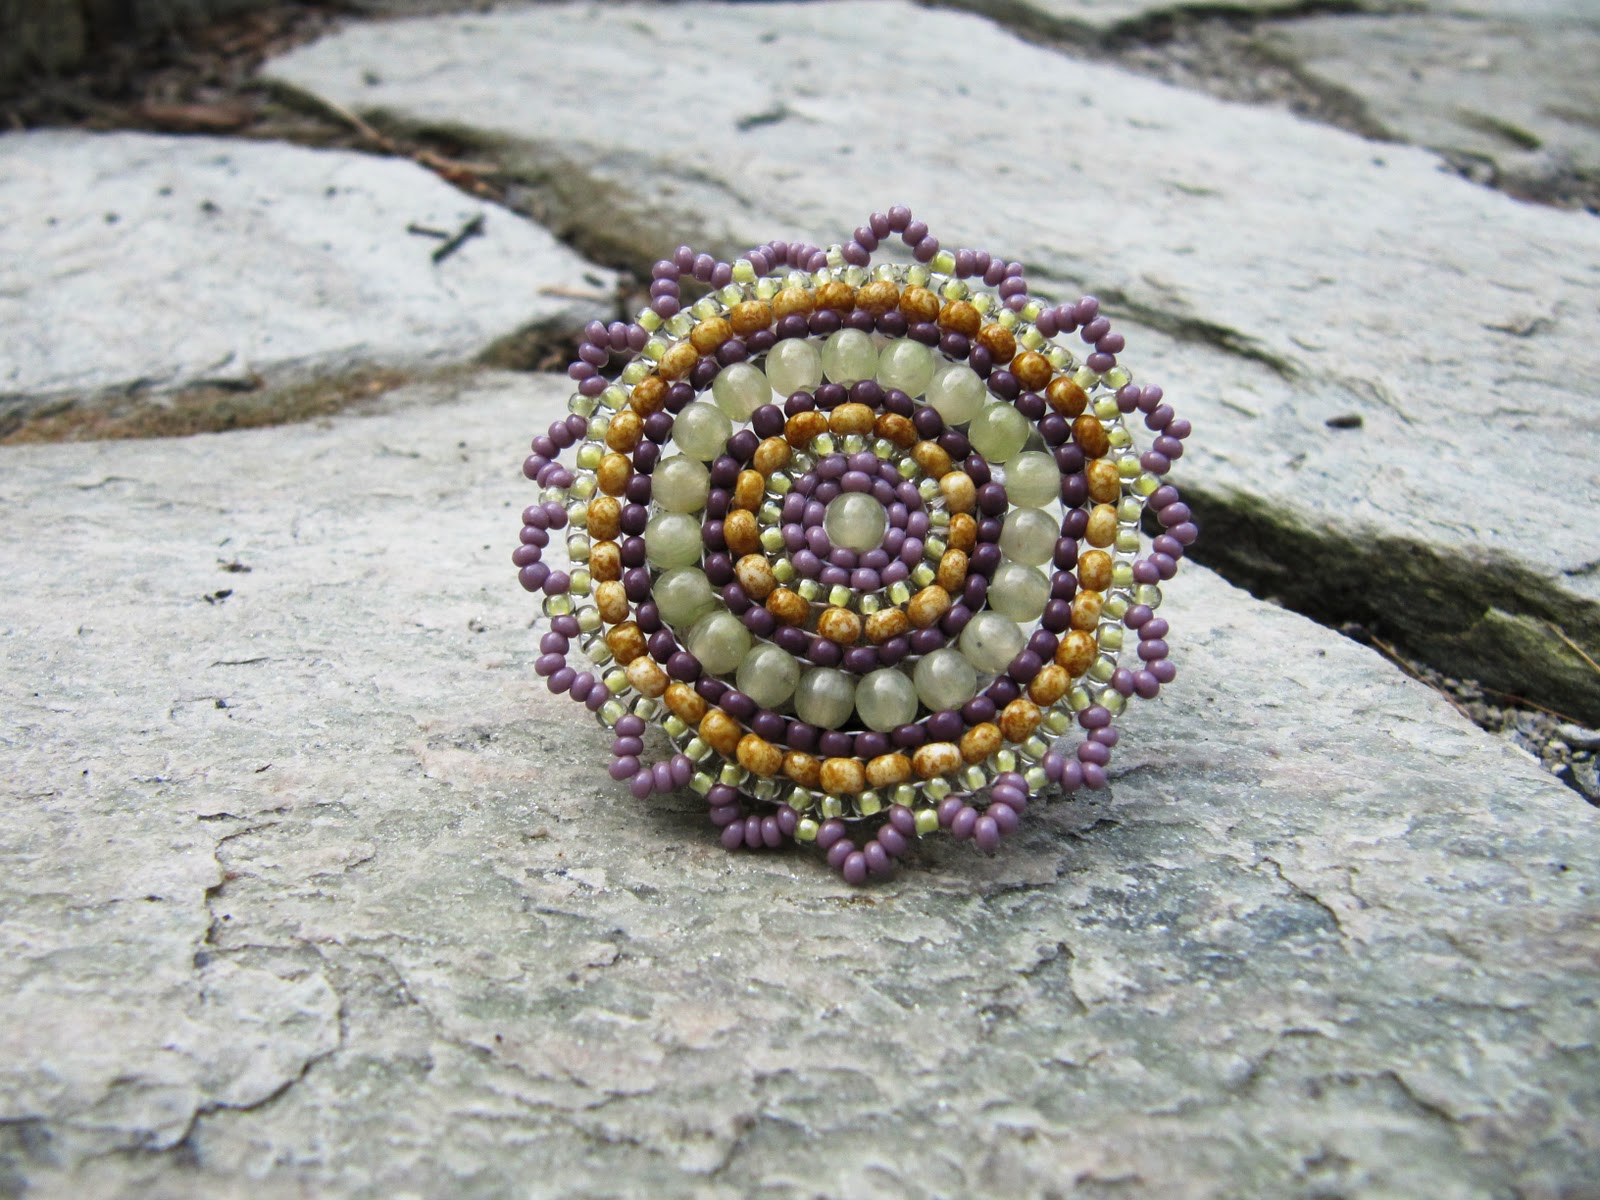
My medallion design, totally original and it looks great with pajamas.

...next week, the amateur/hobbyist - a person who engages in a study, sport, or other activity for pleasure rather than for financial benefit or professional reasons.
What would make the beginner different from the hobbyist in your opinion?

Tuesday, October 19, 2010

Till the end of the day...

These will be on sale, and then they will be leaving the shop, so if you'd like to get a great deal and an early jump on Christmas shopping, now's your chance..


Monday, October 18, 2010

Margie and Me - #80 Weis Church Fresco

I've really been wanting to go Rococo/Baroque lately. I think the use of gold metallics and shiny shimmery pastels is very Christmasy, so it seemed as good a time as any to go Rococo!
This week, I've chosen #80 Weis Church Fresco from Margie Deeb's book, the Beader's Color Palette.
Here is a snapshot of the ceiling fresco.

 As you can see, the emphasis is on blue with accenting pinks and golds. I think these are the colors to focus on, as it can get a little overwhelming I think if you try to incorporate too many of the colors.
I tried running it through the color generator, and it just wasn't coming through with the right colors, so I've just posted a picture here, you might want to do a little hunting on your own for some different pictures, and remember that Margie includes the Delica numbers in her book.

 This is a photo of the church, you can see the round shape where the ceiling fresco would be.
Okay, here are the "rules"
-You'll have two weeks to create your inspiration piece. It can be anything, bead embroidery, beadweaving, stringing...
- On October 30th. Post a picture of your piece to your blog, or flickr, and leave a link on my blog entry so everyone can visit, or send a picture to me and I'll post it here if you don't have a blog.
- Be sure to check out Margie Deeb's book, The Beader's Color Palette for a better explanation of our color inspiration and for exact bead colors.

Finally, I'd like to show you Shirley's piece, she e-mailed it to me over the weekend, and I meant to update my current post with it, but never found the time, so here's Shirley's piece inspired by the Lady with the Ermine. I'm loving the curly shell beads and the handmade peyote spacers, great job!


Last but not least, a HUGE THANK YOU to all my beady chicas that played along with me for the last color challenge. I'm glad that you found the challenge challenging, but I'm really glad that you participated, it gave me a little added encouragement to create and stick with it.
THANK YOU!!!!

Saturday, October 16, 2010

Margie and Me - The Portrait of the Lady with the Ermine Part 2

I know last week I showed you my first Margie and Me creation, the brooch/pendant combo, which I'm lovingly calling the penrooch (or the brendant, whadda ya' think?). Well, the idea wouldn't go away, so I created a second one using the colors of this week's challenge.


I asked the lady with the ermine and she told me she'd wear it any day of the week, as a brooch...


...or a pendant.
(By the way, now that I'm lookin' at that picture, does anyone else notice the set of guns on that rat?!)


I'm also slowly working through my set of copper bobby pins that I bought. I created these yesterday, and I'm pretty sure that I was channeling the cubist period. They are a bright fuschia/magenta color with a little bit of a metallic finish. They can be found here in my shop.


Finally, I created another medallion pendant. This one has picasso jasper rounds (because you know I have a problem) and some deep amber size 8's. I'm not listing it in my shop just yet because I'm not crazy about the chain. Any suggestions? I like the gunmetal, it just may be that this particular gunmetal is too shiny. I dunno, what do you think?

Last thing, please check out the Sale section of my shop, I dropped a bunch of stuff in there this morning to try to move it out to make room for some new stuff for the holidays.

Okay, the real reason we're all here! Leave your link below so we can all hop around and see what you made for Margie and Me!
I'm going to Zumba this morning, but when I get back, I'll do some blog hopping.
Thanks so much to those of you who created this time around I had a great time and I hope you did also.